![]()
![]()
What is a self portrait? It’s a representation of you. When you make a self portrait, you can choose the way you want to show yourself. It might be a pencil drawing, a still photograph, or a colourful painting.
Many self portraits are realistic visual representations - they look like us! These portraits look like their artists:
 Rembrandt, Public domain, via Wikimedia Commons
 Milena Pavlović-Barili, Public domain, via Wikimedia Commons
But we can have abstract self portraits. An abstract self portrait isn’t necessarily how you look in real life. Instead it might use shapes, colours, and forms to represent you.
 Lajos Vajda, Public domain, via Wikimedia Commons
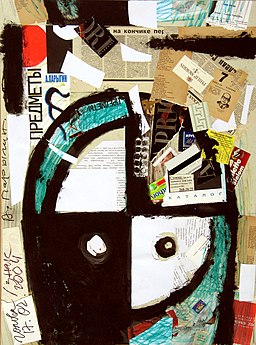 Aleksey Parygin, CC BY-SA 4.0, via Wikimedia Commons
Now, let’s use code to draw a self portrait using your personal data. You’ll use data visualisation software to paint an abstract drawing based on personal data you choose to share.
Rather than using paint or pencils, you’ll use computer code. P5js is like a digital sketchbook, you write the code and it makes marks on the canvas. These marks might be lines, shapes, or patterns.
Each of the marks made by your code will represent something significant to you. It might represent the year you were born, your favourite hobby, or the colour of your hair or eyes. These marks might be lines, shapes, or patterns…they don’t have to look like the thing they represent… they can be anything!
Now it’s your turn to create a data selfie, and share it with us.
First, who are you? First Name: School or Group name:
Let’s use some personal data to create a simple data visualisation. To make this data selfie, you’ll need to know your age (in years) and your height in centimeters.
Press the Play button to run the code. You’ll see the sketch appear on the right hand side. Then, follow the instructions below the widget:
Follow these instructions
1. Move the sliders The circles represent two pieces of personal data: age, and height. Try moving the sliders and watch how the circles change.
2. Set the sliders Look at the code on lines 27 and 31, that’s the instructions to draw the circles. myHeightCm and age are called variables, these store the values of your age and height. When the sliders are moved, the values stored in these variables change. Set the sliders to be your own age (in years) and height (in centimeters)
3. Now, try changing some of the code. There are variables on lines 6 and 7. These store colour values. Change the code on lines 6 and 7 to represent the colour of your socks, and the colour of your eyes. For example:
let mySocks = "purple";
let myEyes = "blue";
Press Play to run the code again and see your new data selfie.
4. Try playing around with some other lines of code. Can you work out how to change the background colour? If you make a mistake you can always press the Revert button to go back to the original version of the code.
5. How tall are you compared to Harry Styles? Copy and paste this code starting at line 39. This will draw a blue circle representing Harry’s height. Press Play to run the code. Can you work out Harry’s height in cm?
  //Draw a circle to represent Harry Styles height
  strokeWeight(4)
  stroke(color("blue"));
  fill(0, 0, 0, 0);
  circle(200, 300, (183*2.5));
  stroke(color("black"));
  strokeWeight(1)
6. You did it!
Once you’re finished you can When you send your selfie a copy of the image will be sent to us.
It’s worth knowing that none of your code is sent to us, only the image of the selfie.
Let’s visualise some more data about you! We’re going to make a data visualisation which represents a typical day in your life. It looks a bit like stripes or a barcode.
Press the Play button to run the code. You’ll see the sketch appear on the right hand side. Then, follow the instructions below the widget:
1. Add your data The width of the bars represent the proportion of your day you spend doing certain activities.
Count how many hours you spend on a Wednesday doing the following:
Now, go to lines 10 to 14, and change ‘how you spend your time’ to be your hours. This will make the selfie personal to you.
Play the code then you can
2. Remix for the weekend Do you think your selfie would look the same if it was a weekend? Do you spend more time in bed? Do you do more exercise at the weekend?
Let’s change the stats to describe what you did last Saturday. Once you’ve done that remember to change the title to say “A typical Saturday”.
3. Send it in Once you’re happy, you can
You can use data selfies to reflect your personality. This data selfie visualises your hobbies and interests. Press the Play button to run the code.
In this sketch, an emoji is used to describe each hobby and interest. The number of sides on the shape tells us how much you enjoy the hobby, the more sides the more you enjoy it!
Follow the instructions below and create your own version of this selfie:
1. Pick your hobbies Use this tool to pick 4 emoji that represents each of your hobbies or interests. Do you like singing 🎤 ? Or painting 🎨 ? Or playing games 🎮 ? Or baking 🧁?
2. Add your first hobby The code to draw the first hobby is on lines 27 to 34. Replace the emoji on line 34 with the emoji for one of your hobbies. Use copy and paste to add it in. Press Play and you’ll see your new data selfie.
3. Change the shape Now let’s change the shape. This code (from line 32) draws the shape around the emoji. A polygon is a flat shape that can have any number of sides.
polygon(0, 0, 80, 4);In this line of code the last parameter (the final number before the closing parenthesis) determines the number of sides the polygon has. This polygon has 4 sides - it’s a square!
Now, change that number to represent how much you enjoy your hobby. Do it on a scale from 1 to 10, where 10 would be the highest. Remember to Play your sketch again to see the updated version.
4. Add your other hobbies Now do the same for your three other interests. Add the emoji and change each polygon to match how much you enjoy each hobby. You can Play your sketch to check it’s working. Remember if you make a mistake the Revert button lets you go back to the original code.
5. Send it in Brilliant! Now you’ve remixed the sketch you can send us your selfie.
6. A change of colour? Want to take it further? You can try changing the colours of each shape. You’ll find the code you need to change on lines 3 to 7.
This selfie will allow you to create a data visualisation based on some secret data. Unlike our earlier sketches it will be impossible for someone else to work out what the data is based on what the selfie looks like.
Press Play on the widget to scramble some data.
1. Have a go Edit the code in line 3 to say your name and house number, then press Play. Remember not to include your full address or street name, just your house number is fine. The selfie that is generated is based on this personal data you’ve added, but don’t worry - nobody will be able to work out what it is!
2. Investigating how it works Unlike the other selfies you made, there isn’t a pattern that lets you work out what the original data was. If you try changing the house number even just by 1, the selfie will look completely different. Your next door neighbour wouldn’t have a similar looking selfie.
Try it now. Try different house numbers and check that the selfie is different every time.
3. Add a secret message Let’s add a secret message into the selfie. We can hash (scramble) the message. Change the code on line 3 to create a new selfie with a hidden secret message only you know.
4. Send it in Brilliant. You’ve just made a data selfie that is truly personal to you, and you can share it with other people, but they’ll never be able to work out what personal information is stored inside it. You can now
Remember, when you send your selfie to us it doesn’t send us any of the code, just the image. We won’t store or hold any personal information about you.
Hashing This selfie uses a technique called hashing. It’s used when people want to store secret information, like when companies protect passwords. It would be a bad idea to store everybody’s password in a readable format. Instead, companies calculate another value based on the password and store it. When you login, your browser will do the same calculation and send this value to the website. If it matches, then we know you knew the password.
Now it’s your chance to make one more selfie. Read through the code below and change the data to fit your personal data. Code your data selfie and then send your selfie to us when you’re ready.
If you want to download an image of your selfie, just click on it.
Handy tools for picking emoji and colours.
Once you’re finished you can
We’ve got lots of other activities that you can try out:
This activity was created by Digital Skills Education as part of Data Education in Schools. Data Education in Schools is part of the Edinburgh & South East Scotland City Region Deal’s Data-Driven Innovation Skills Gateway.
![]()
![]()
![]()